Operation: Laser Launch
Year: 2024
Scope: Safety planning; equipment set-up; ordering supporting equipment, supplies and stock; handbook writing; template design; training materials design; workshop planning; workshop facilitation,
Collaborators: Co-workers at DIALOG
When our studio acquired a new laser cutter, I stepped up to help integrate it into our maker space, excite people about the capabilities of our new tool, establish appropriate safety practices, and set our team up with experience, information, and the resources to succeed.
The case for a laser
Since working at DIALOG as a summer student, I’ve taken an active interest in the studio’s maker space. It houses large-format plotters, two 3D printers, and model-making tools and supplies. Since model-making is one of the main purposes for having such a space, one tool always seemed conspicuously missing: a laser cutter.
While a 3D printer is an additive fabrication tool, building material up from a blank slate, a laser cutter is a subtractive tool, removing material from a piece that starts whole. These techniques have distinct appropriate uses, so the two are often used complementarily. Many of the most compelling and well-executed architectural models I’ve seen harmoniously combine 3D printed and laser-cut elements.
I was not alone in this thinking, and I teamed up with other like-minded designers at work to petition the technology and leadership teams to invest in a laser cutter. I recommended a specific brand and a model that I believed would be minimally disruptive to staff seated nearby, require no changes to the building’s ventilation system, and be easy to train new staff to use, especially our student employees. These junior designers usually stay for 4-8-month work terms and spend more time in the maker space than anyone else.
We argued that a laser cutter could be used not just for model-making but to create public engagement materials, to cut and engrave custom signage, to produce our own branded SWAG, and for special design projects like the Festival of Trees.
Weeks later, our new machine was on the way.
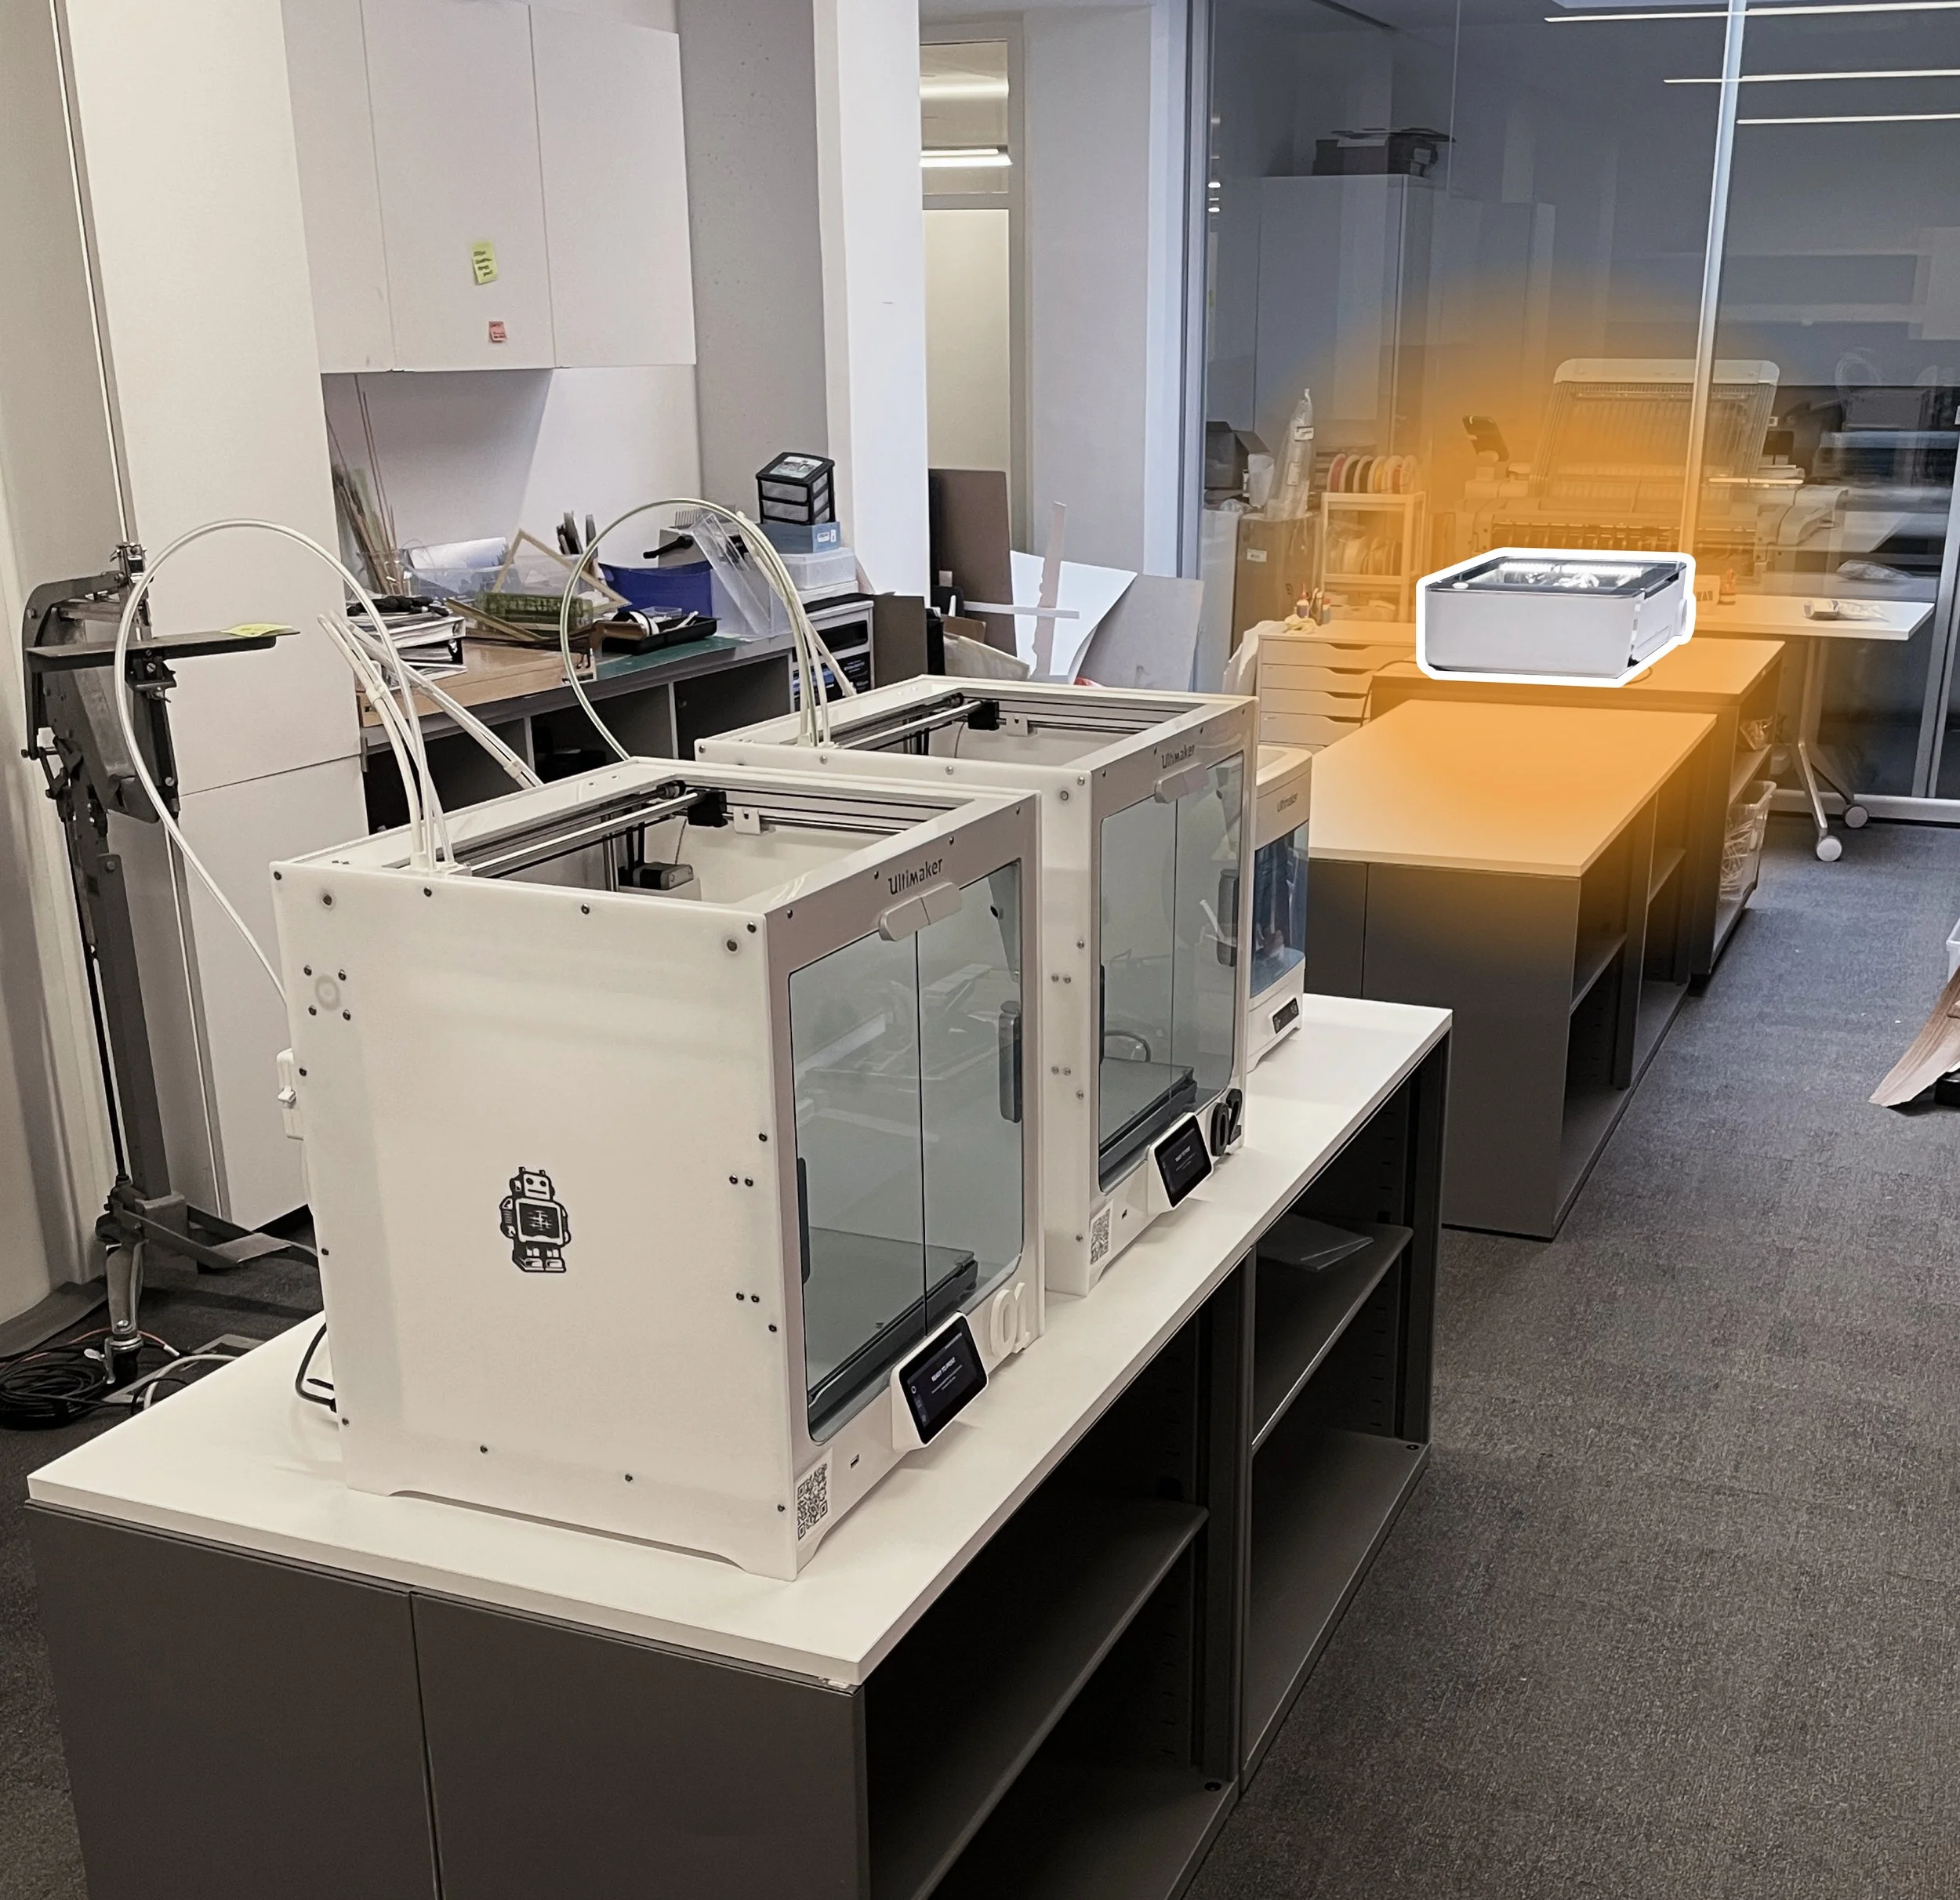
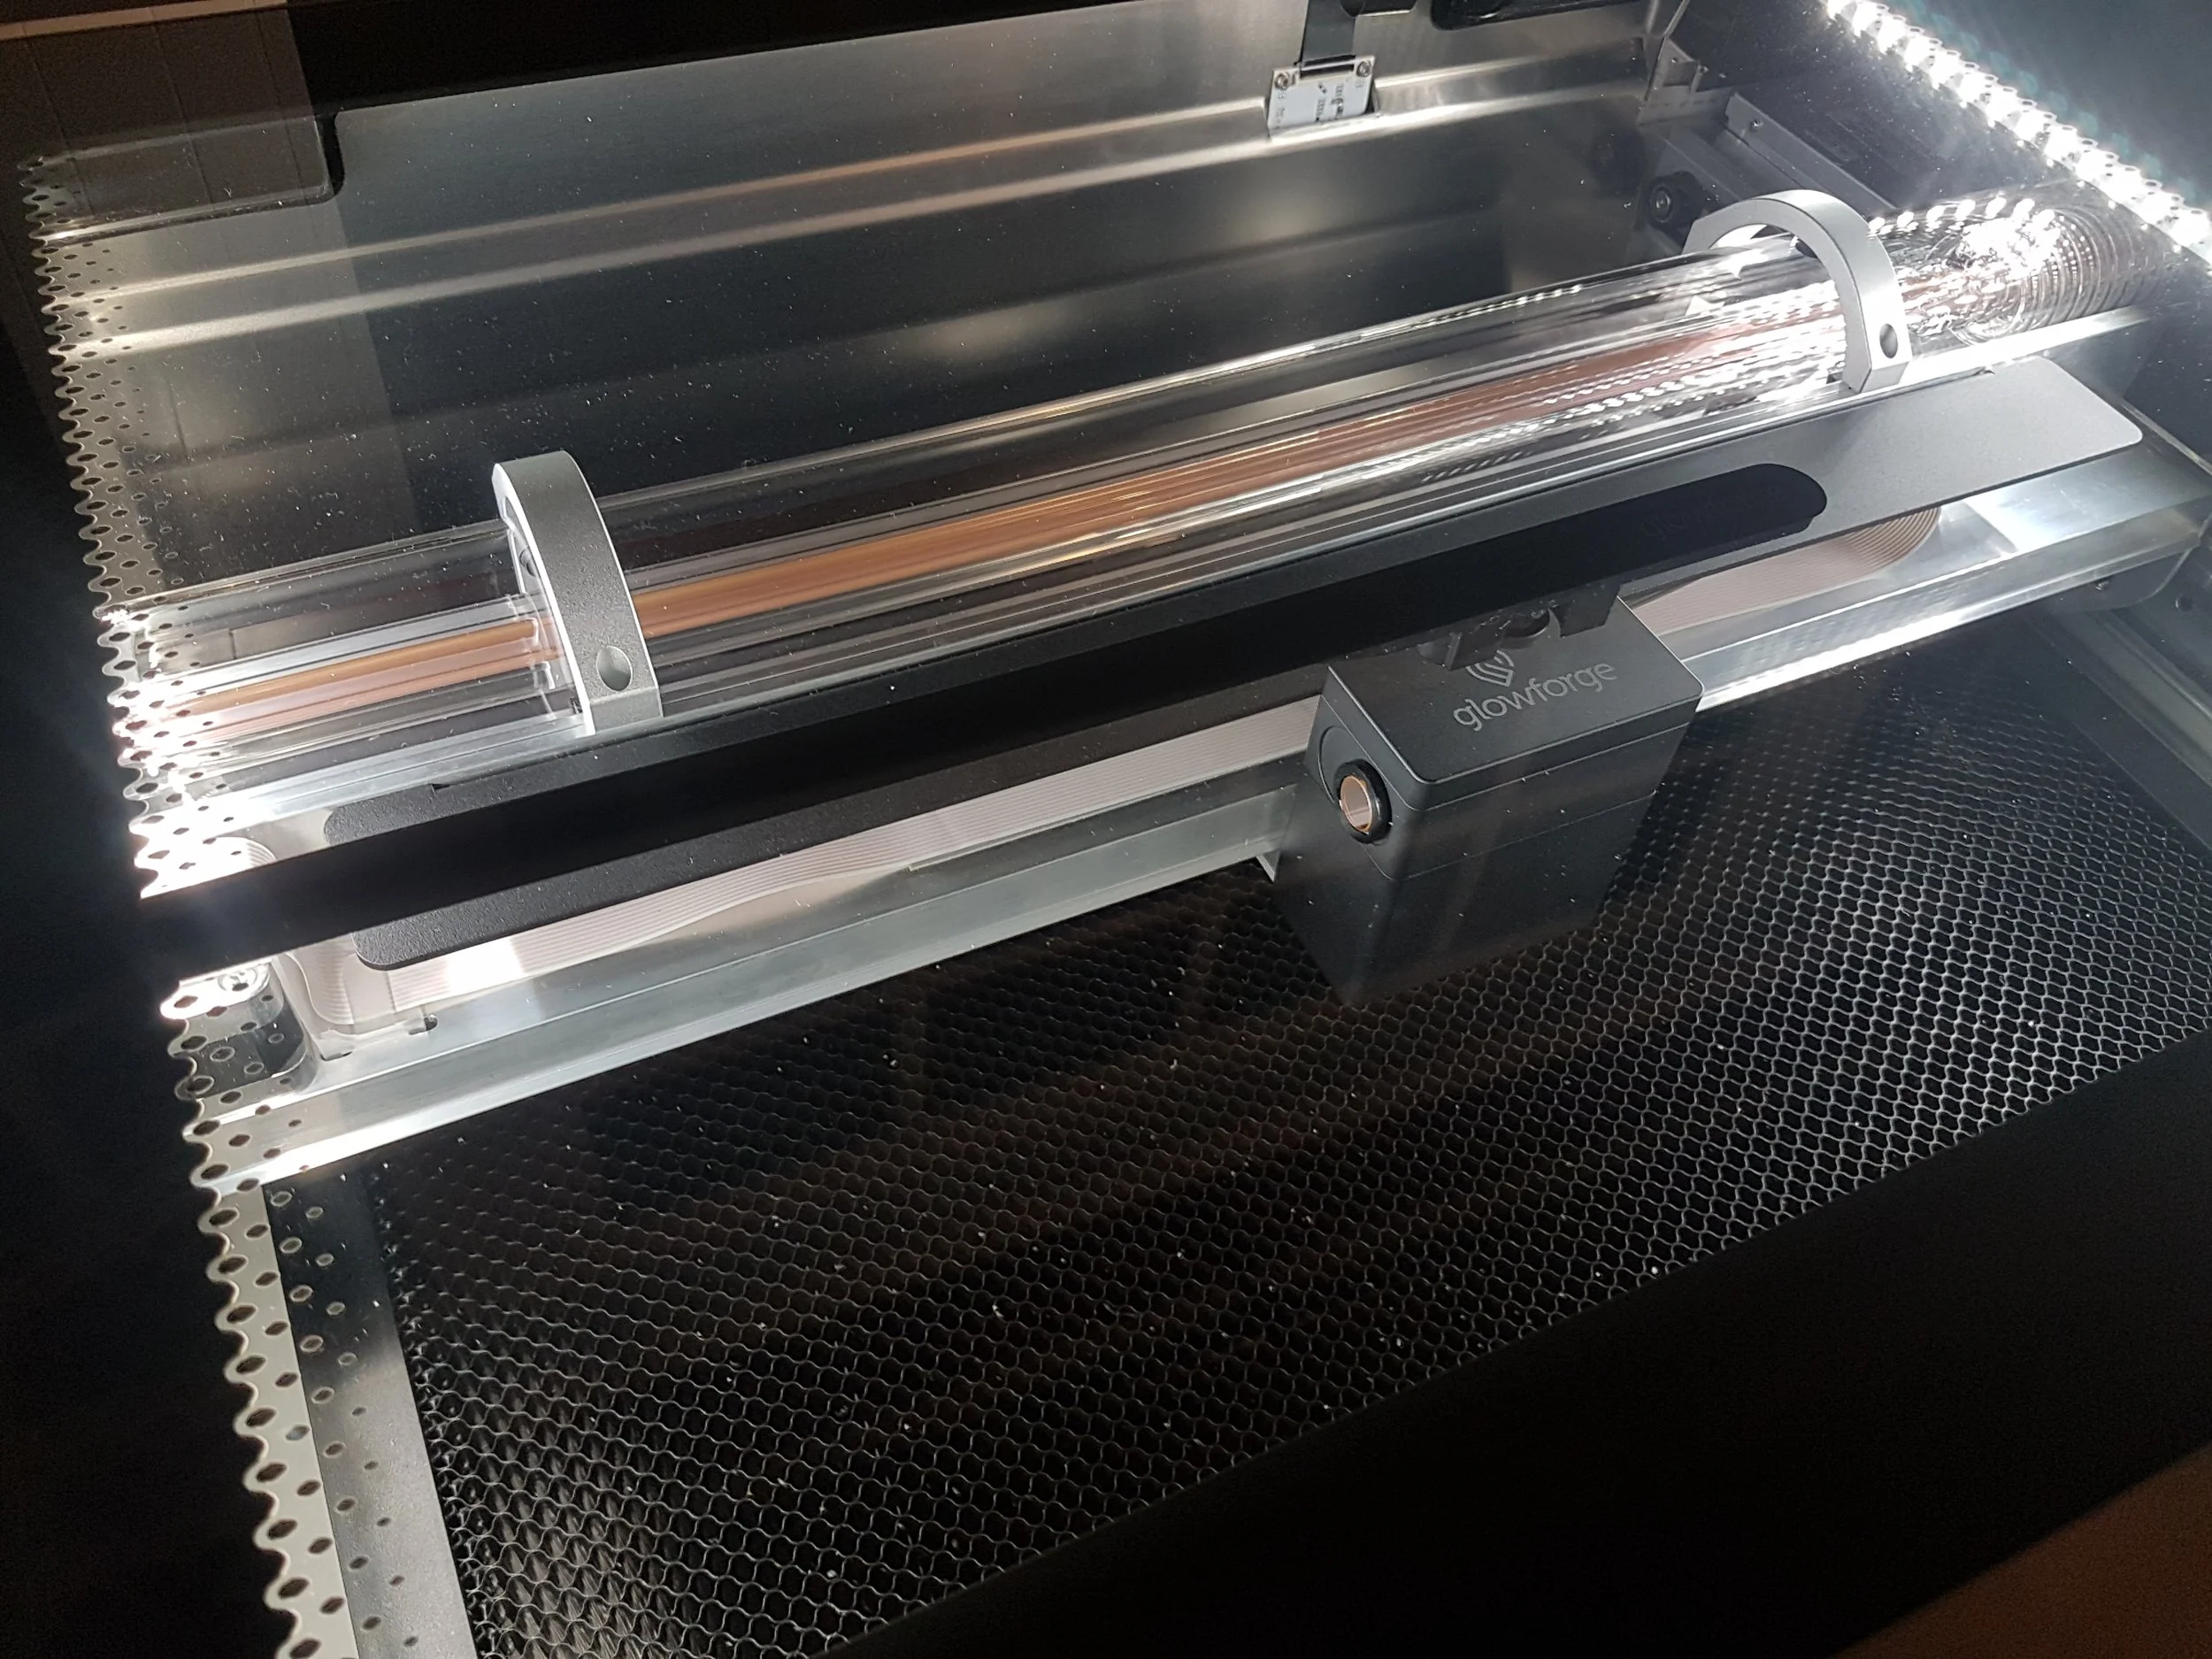
The DIALOG maker space, shortly after the new laser cutter was unboxedSpace and safety planning
I have significant experience working with laser cutters, so I happily took responsibility for ensuring safe use of the laser cutter at work. Some of the measures I took in the weeks just before and just after the laser arrived include:
Coordinating with the technology and studio safety teams to determine who should have access to the device, how software log-in access could be best managed, how training would be carried out, extra safety measures required for Class 4 laser operation, and how the laser cutter should be incorporated into the studio
Performing a safety analysis of the laser location, identifying required and recommended measures for safe use. E.g. remove any flammable liquids from the storage shelves below the laser cutter, post safety information where it’s easily readable while operating the device.
Placing printed copies of the owner’s manuals near the laser
Setting up the laser, air filter, and supporting space in the studio
Setting up for Success
I also spent significant time compiling, drafting, and distributing documents to make operating the laser as simple, stress-free, and safe an experience as possible. These included:
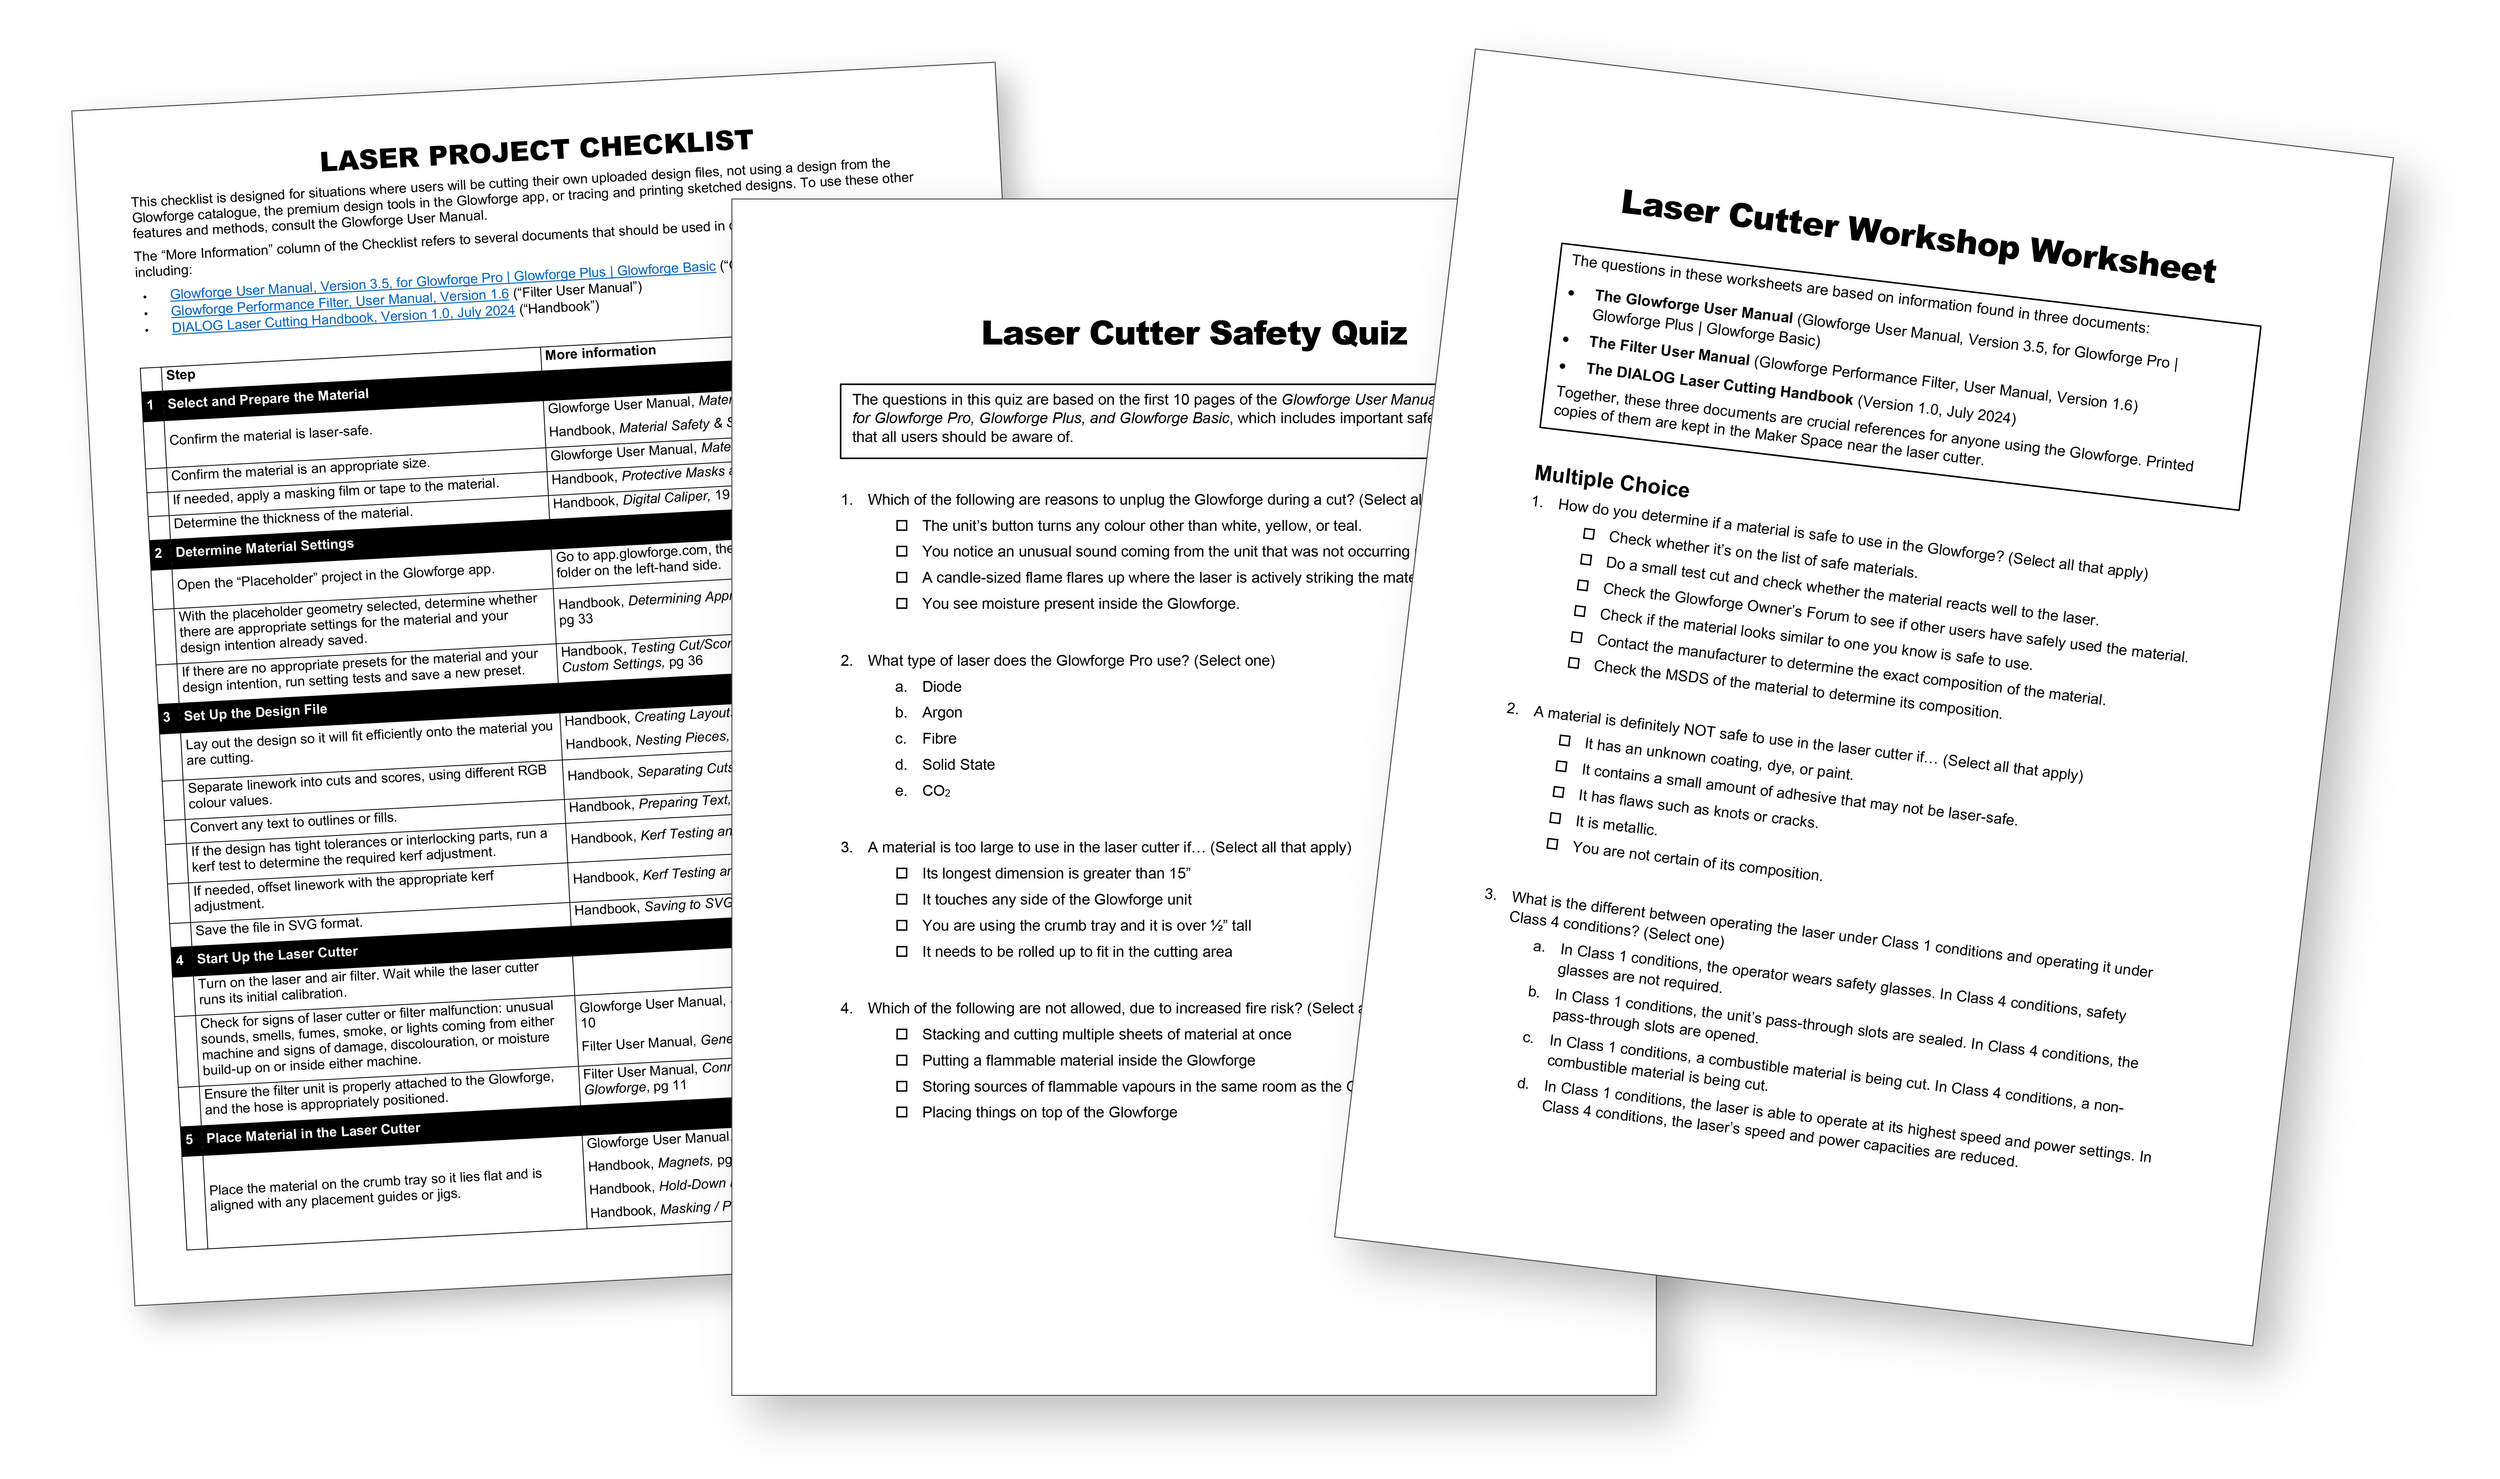
Templates, such as a material test matrix, for determining appropriate settings for novel materials or effects
A one-sheet checklist to guide new users through every step of a project
A purchasing list of supporting tools and supplies for the laser cutter
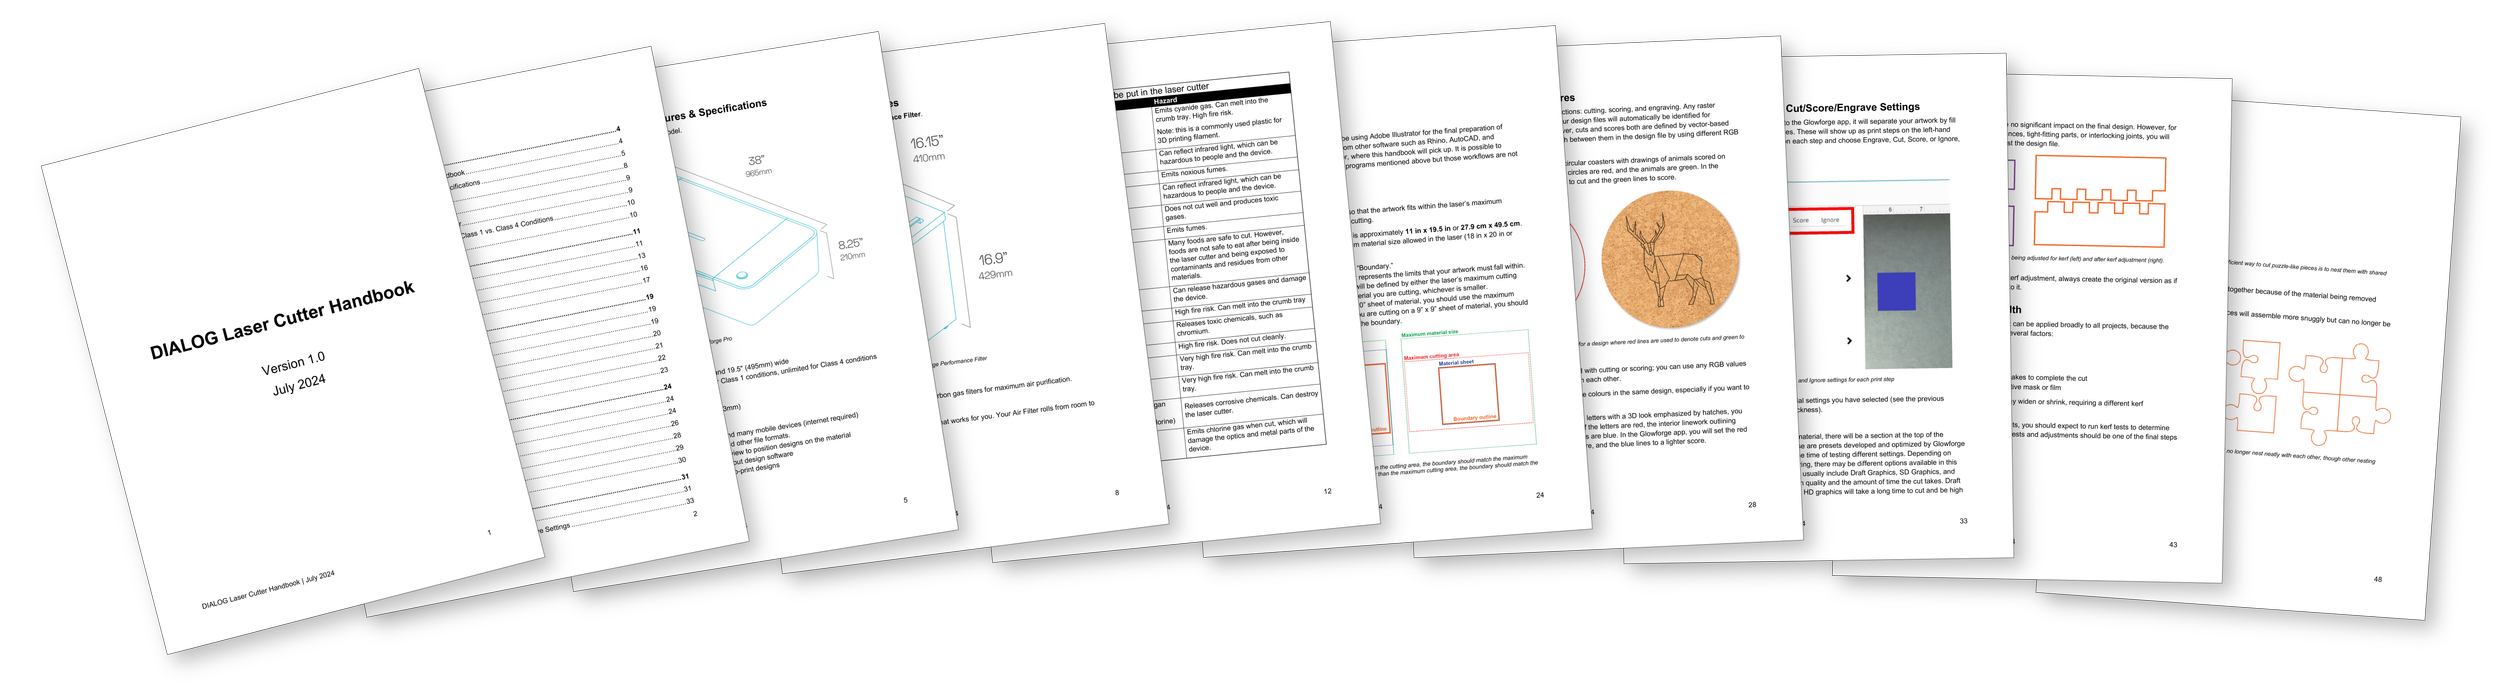
The first version of the internal Laser Cutter Handbook, a supplement to the Glowforge manuals, containing information about:
Safe and unsafe materials to cut
Material sources and suppliers
Supporting tools/supplies and their uses
Design File set-up for Adobe Illustrator, including nesting pieces, preparing text, and saving to SVG format
Performing test cuts
Kerfs, kerf testing, and kerf adjustments
The workshop sample project - a phone stand featuring a live hinge
Workshops
Finally, with the support of the studio’s technology team, I facilitated a series of workshops to train the studio’s first co-hort of laser users. We chose to run the workshops with small groups of no more than four participants, so the sessions would feel more informal and conversational.
I prepared all of the training materials in advance and led the sessions. The workshops consisted of:
A brief safety quiz, based on a few pages of the owner’s manual that I asked participants to read ahead of time
Review of the safety quiz answers
A hands-on introduction to the parts of the laser cutter and filter, including rationales for the most crucial safety practices
An opportunity for each participant to operate the laser’s web-based control software and the laser itself to execute a beginner-friendly project
A worksheet for participants to complete while others took turns operating the laser. The questions were designed to familiarise users with the user manual and handbook.
Informal Q&A throughout
I designed the beginner-friendly project - a simple phone stand - to be a quick cut and a useful object, but also to demonstrate a subtractive fabrication technique called kerf-cutting. A series of closely spaced offset dash cuts transform a flat, rigid material into a bendable hinge. Participants chose their materials from a collection of acrylic sheets in varying colours, transparencies, and levels of glitter.
I recorded informal feedback from participants during workshops, including ideas of how to improve the usability of the laser area for high-intensity users, e.g., power access for laptops, dedicated monitors.